ESP8266 meets NodeMCU
Yesterday, I made great progress on playing around with the ESP8266, the $2 Wifi Module[1]. I will continue to document my progress on this blog. First, I just want a place to dump all my notes. That way, if (when) shit start burning, I can at least replicate what I know to work. Second, other people might find it useful and if I can help you avoid some of the headaches I went through, then all the better.
The Hardware
ESP8266
Ah, the ESP8266, the $2 Wifi Module[1:1]. For the impatient, it's also available on Amazon Prime for $8 with Prime Free Same Day Delivery[1:2].
Isn't it just the most adorable thing? 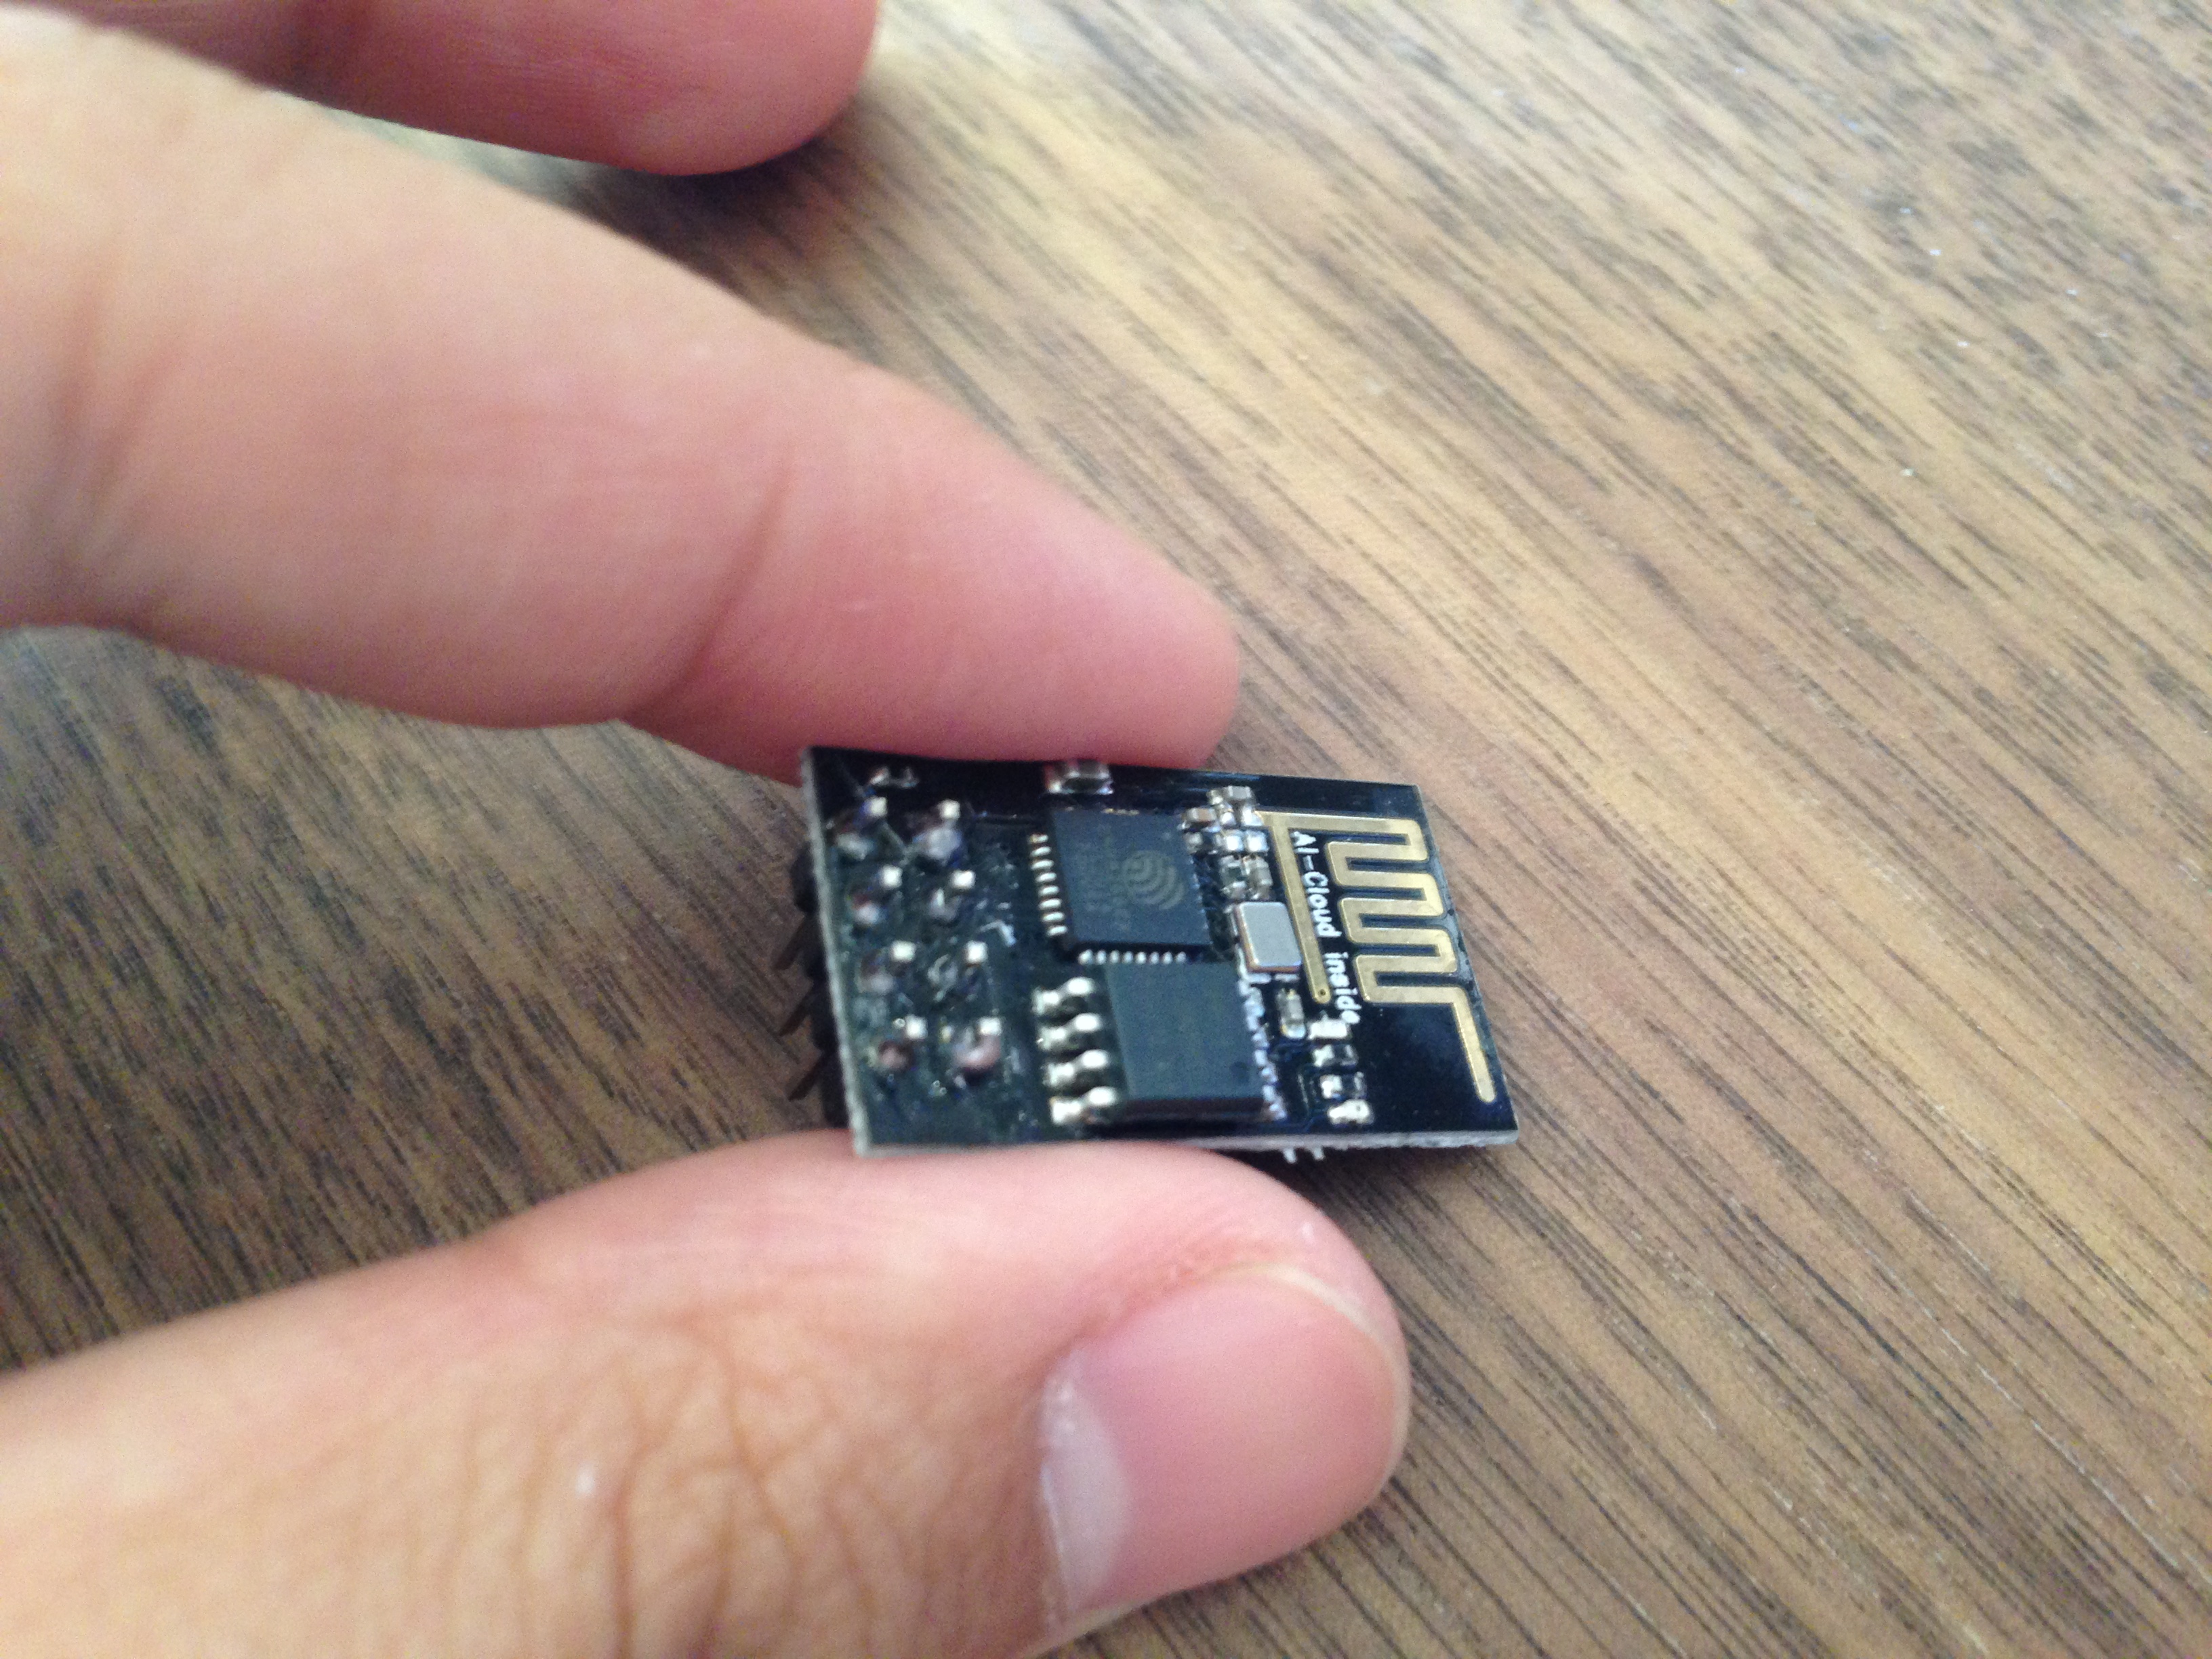
FTDI Cable
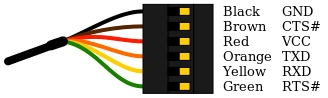
To connect to my laptop, I used Adafruit's USB FTDI Cable. 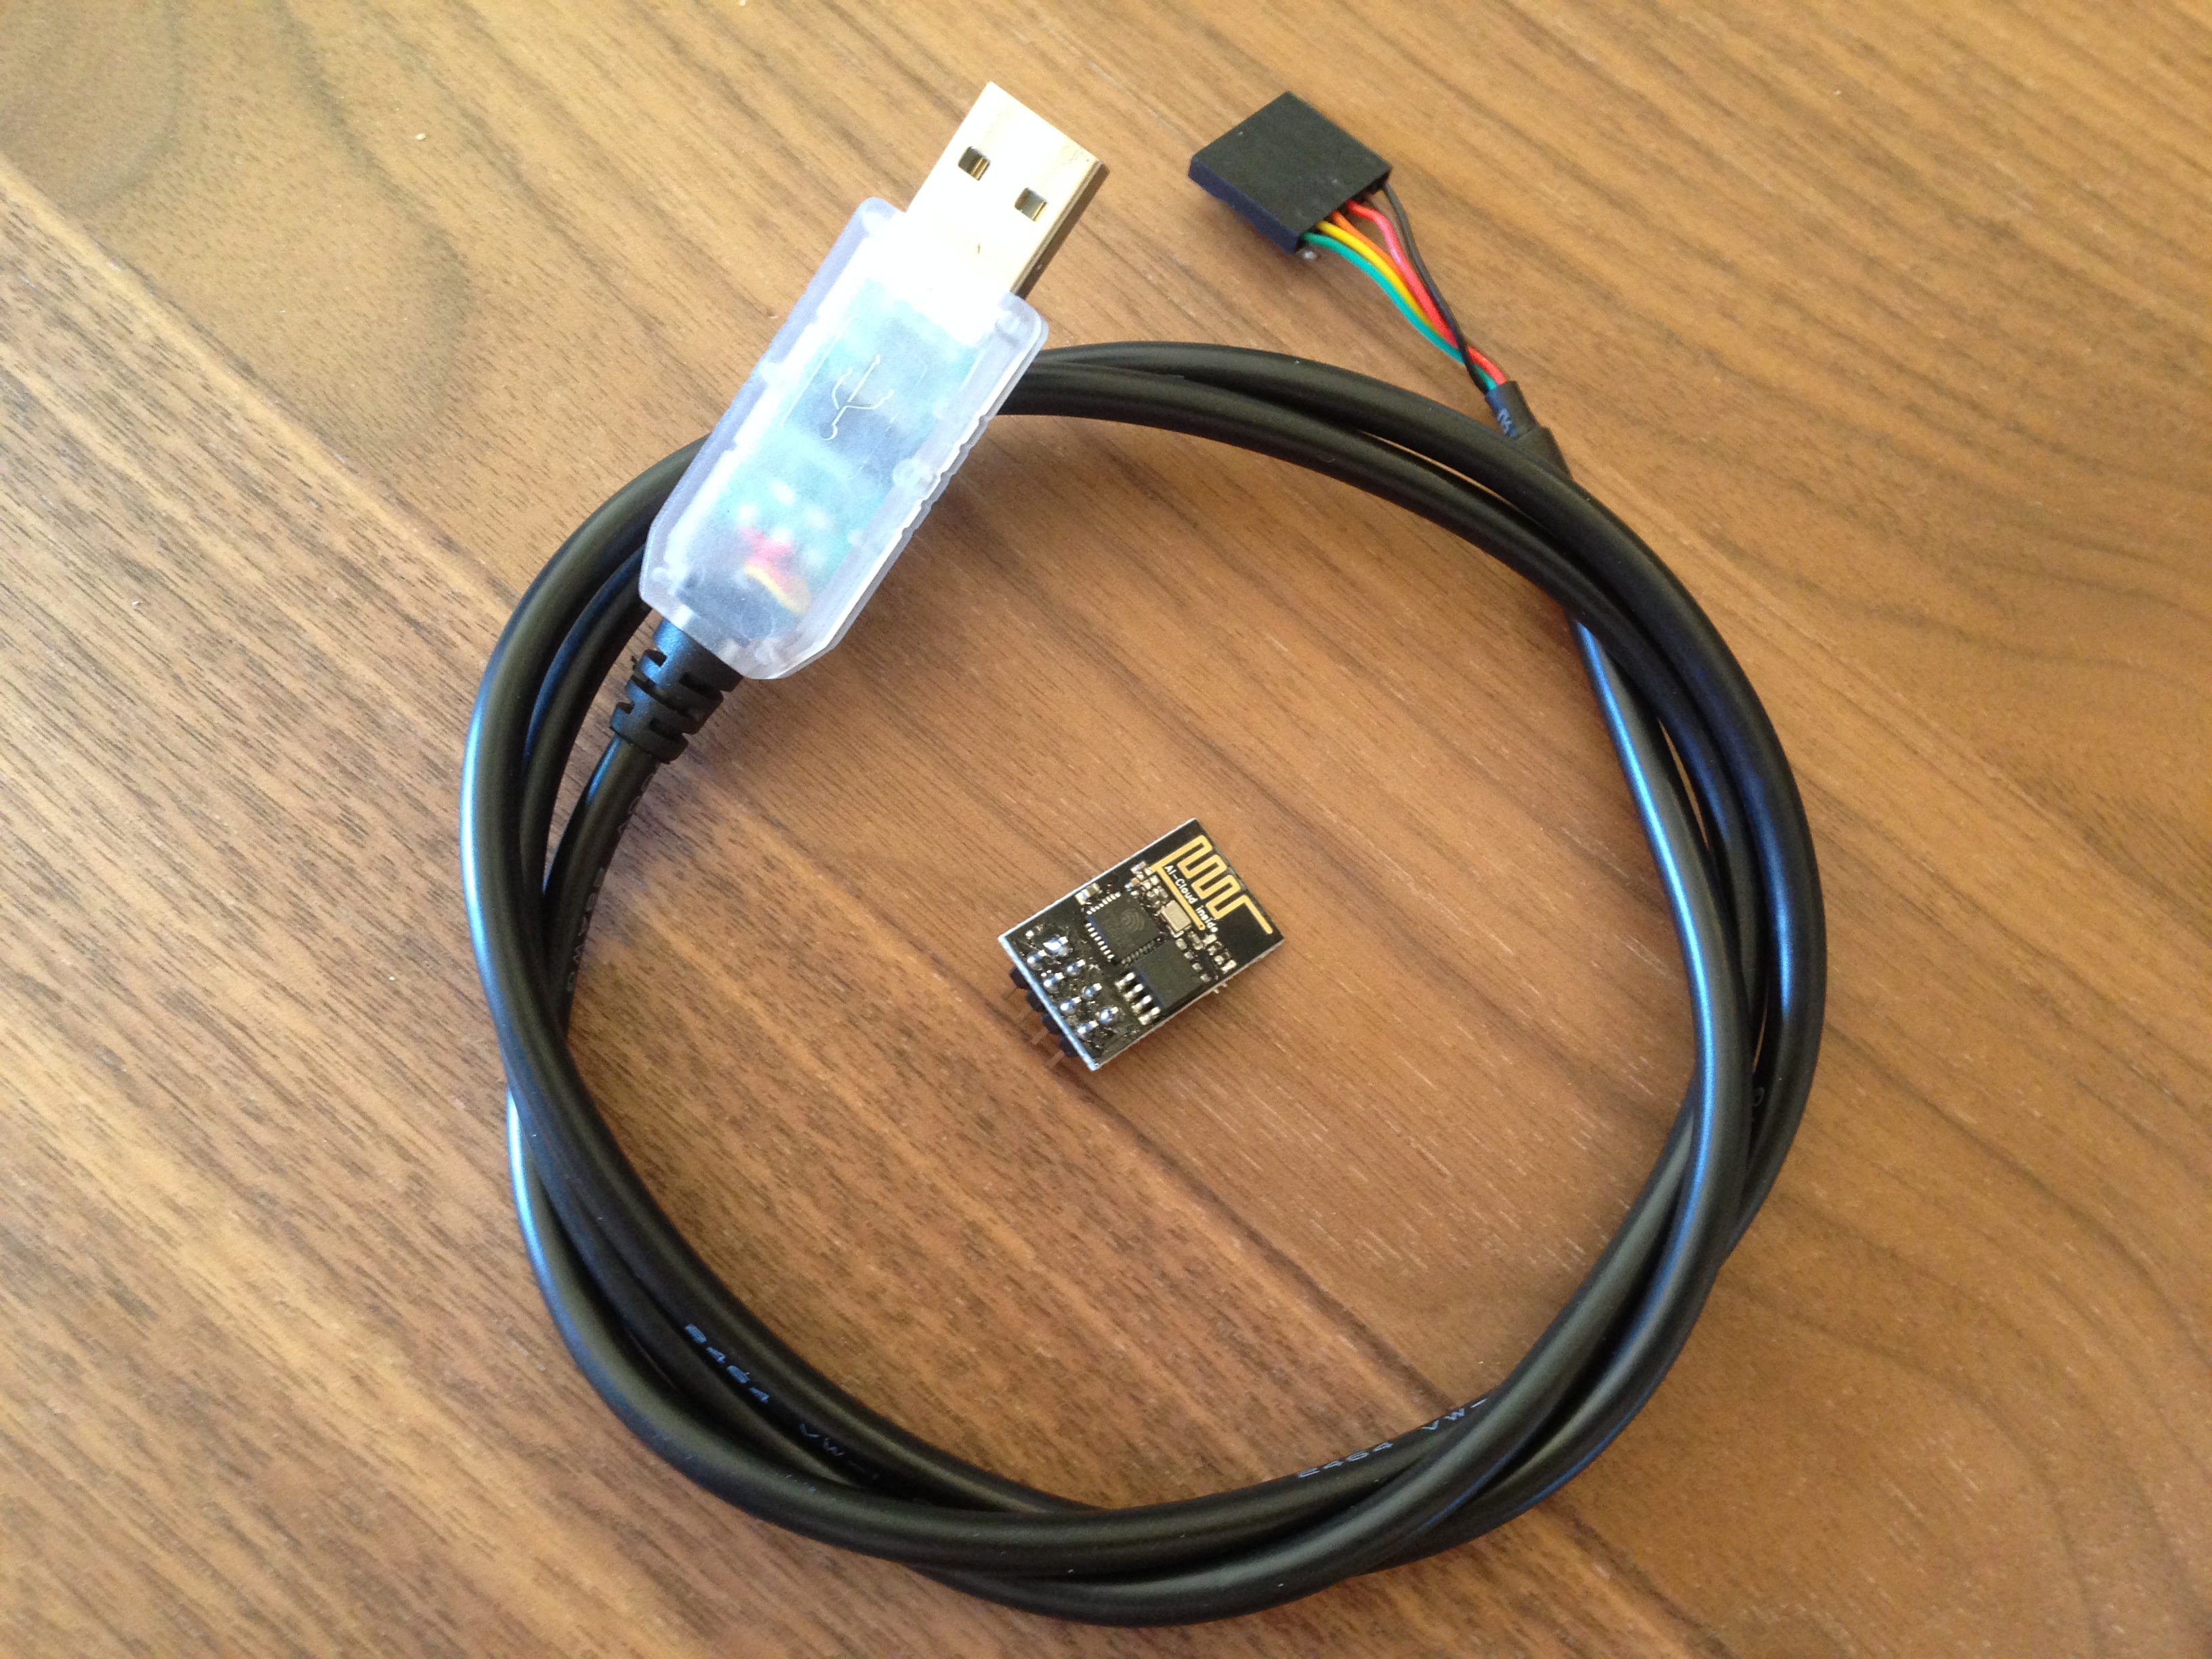
Jumper Wires & Breadboard
You can use female-to-male jumper wires and male-to-male jumper wires to connect the pins on the ESP to the FTDI Cable. You might also need a breadboard since two wires sometime go to one input.
The Software: NodeMCU
NodeMCU lets you use LUA scripting language to program the ESP8266. Apparently, there are some issues with memory going this route. I found it to be pretty straightforward.
If you are comfortable with Arduino, there is an Arduino library. I'll cover how to use ArduinoIDE in a different post.
Here's what I did to get it working[1:3]:
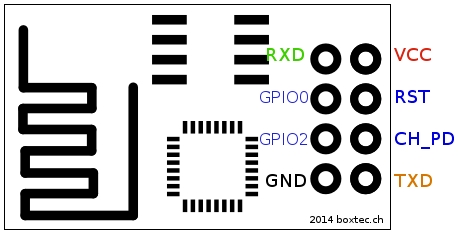
1. Hooked up ESP8266 in NodeMCU Flasher Mode
 |
 |
|
| ESP8266 | FTDI | Why? |
|---|---|---|
| VCC | VCC | POWER! |
| GND | GND | POWER! |
| TX | RX | Send info from esp to computer |
| RX | TX | Send info from computer to esp |
| GPIO0 | GND | Ground to start update |
| GPIO2 | None | |
| Reset | None | |
| CH_PD | VCC | Enables the chip |
2. Flash NodeMCU Firmware
Mac/Linux Command Line can use Esptool (see below). Windows machines can use NodeMCU-Flasher.
Get Port Name
I ran this command to get the port name for my USB. The USB has to be plugged in and hooked up for this to show.
ls /dev/tty.*
On a Mac, you should get something like /dev/tty.usbserial-ABC.
For Windows, you can use your Device Manager and look under "Ports (COM and LPT)". The Port Name should be COM3 or something like that. You might have to install FTDI Driver first.
esptool
Esptool is a Python script that lets you flash the ESP8266 module.
Download latest NodeMCU Firmware (a file name "nodemcu_latest.bin") into some folder. Then, install Esptool, I used git clone to do this. You can also just download the python file, esptool.py.
git clone https://github.com/themadinventor/esptool.git
cd esptool
python esptool.py --port <YOUR_PORT_NAME> write_flash 0x00000 <PATH_TO_FIRMWARE>
For example, say your port name is /dev/tty.usbserial-ABC and you downloaded the nodemcu_latest.bin to /Users/me/nodemcu/nodemcu_latest.bin, you'd write:
python esptool.py --port /dev/tty.usbserial-ABC write_flash 0x00000 /Users/me/nodemcu/nodemcu_latest.bin
3. Hooked up ESP8266 in NodeMCU Coding Mode
The coding mode is similar to Flash Mode, but without GPIO0 connected to ground.
|
|
|
| ESP8266 | FTDI | Why? |
|---|---|---|
| VCC | VCC | POWER! |
| GND | GND | POWER! |
| TX | RX | Send info from esp to computer |
| RX | TX | Send info from computer to esp |
| GPIO0 | None | |
| GPIO2 | None | |
| Reset | None | |
| CH_PD | VCC | Enables the chip |
4. Connect via Serial Terminal
For Mac/Linux, use the screen command line tool. Mac Users can also use CoolTerm. Windows users can use PuTTY. Other options are covered in Sparkfun's Terminal Basics Guide. This guide starts with detailed explanation and what this "terminal" thing is and a little history as well. A good read for the curious.
For NodeMCU, use baud rate=9600. I'm not sure if you have to, but all the tutorials I've read online says to use 9600. So sure, why not. 9600.
Screen Command
Screen allows you to use multiple windows (virtual VT100 terminals) in Mac and Linux machines. You can call it using the command line:
screen <PORT_NAME> <BAUD_RATE>
Say, you get /dev/tty.usbserial-ABC as your USB port name and want to connect using 9600 baud rate. You would type in:
screen /dev/tty.usbserial-ABC 9600
To exit screen, CTRL+A theb CTRL+\one after the other.
CoolTerm
You can also use CoolTerm if you want a GUI tool. Open up CoolTerm, then click Options. Set the Baud Rate to 9600 and select the Port. You might have to click "Re-scan Serial Ports."
Then under "Terminal" (option on the left side), check "Handle BS and DEL Character." This will enable you to use the backspace or delete key[1:4].
Then click "OK" and click "Connect."
5. Start Coding!
You can try a simple hello world to see if it works.
print("hello world")
This should return... well, hello world.
Try fiddling around with some of the NodeMCU Examples. A complete list of functions you can call is documented here.
init.lua
init.lua is the file your ESP8266 will run at boot. Just.. don't put an infinite loop into this file like I did the first time. If you do, you'll have to reflash your module.
Now, using a Serial Terminal you can type (or copy/paste) one line at a time. This might make your head explode. In comes luatool to save the day.
luatool
Luatool is a Python script that enables you to edit Lua using whatever text editor you wish, and then send the file to the ESP8266 module.
I used Git Clone to install. But you can download the luatool.py file instead.
git clone https://github.com/4refr0nt/luatool.git
cd luatool/luatool
Then you can upload a lua file in the currently directory using:
python luatool.py --port <YOUR_PORT_NAME> --src <YOUR_FILE.lua>
For example, if you get /dev/tty.usbserial-ABC as your USB port name and want to upload foo.lua. You would type in:
python luatool.py --port /dev/tty.usbserial-ABC --src foo.lua
NOTE: you need to disconnect from all other connections to the ESP8266. So if you're using CoolTerm, click "Disconnect" at the top. If you're using screen, do Ctrl+a then Ctrl+\ to disconnect.
Next Steps
I've found this to be pretty nifty. Looking through the NodeMCU example, you can set up a simple web server, though the memory limits of Lua leaves much to be desired.
Also, we tried on our local network and logging in takes a while. I'm not quite sure how networks work, but I'm sure that I experienced slowness. And I'm sure that I don't like slowness.
1. Better way to parse HTTP Responses
The ESP8266 can also act as a client. It can read webpages and execute certain commands. I will need to write something to parse all the header junk out and return a JSON or something simple. Right now when I send a request, I get this monster:
HTTP/1.1 200 OK
Server: nginx
Date: Sun, 05 Jul 2015 01:56:57 GMT
Content-Type: application/json; charset=utf-8
Transfer-Encoding: chunked
Connection: keep-alive
Status: 200 OK
X-Frame-Options: SAMEORIGIN
X-XSS-Protection: 1; mode=block
X-Content-Type-Options: nosniff
X-UA-Compatible: chrome=1
ETag: "9bb58f26192e4ba00f01e2e7b136bbd8"
Cache-Control: max-age=0, private, must-revalidate
X-Request-Id: 8f9baf99-1418-4558-90ff-de1e2b55988a
X-Runtime: 0.016318
Vary: Origin

d
{"foo":"bar"}
0
All I really want is {"foo": "bar"} here.
2. Better way to load up "large" lua scripts
I also need a way to write larger Lua scripts. luatool is a bit a lot shaky with larger files (>40 lines). Maybe I'll write a function that appends to a file rather than write a new file.
Then again, maybe this is why people use ArduinoIDE to program the ESP8266 rather than NodeMCU. More on that later.
🍻 Oh well, time to drink beer. Happy 4th of July, everyone! 🇺🇸