How to Sketch Animations in Blender

In the last two Blender updates, the Grease Pencil tool got a major facelift. The Grease Pencil was traditionally used for annotating 3D drawings. Now, it can also be used for animation.
And if you are a better drawer or animator than I am, you can create more beautiful movies.
As a bonus, the new Grease Pencil’s stroke width responds to pressure sensitive drawing tools, like my old Wacom Bamboo tablet.
I’m not a drawer or an animator. But, I have been having fun with this neat little tool, so I thought it fun to share.

Grease Pencil Set Up
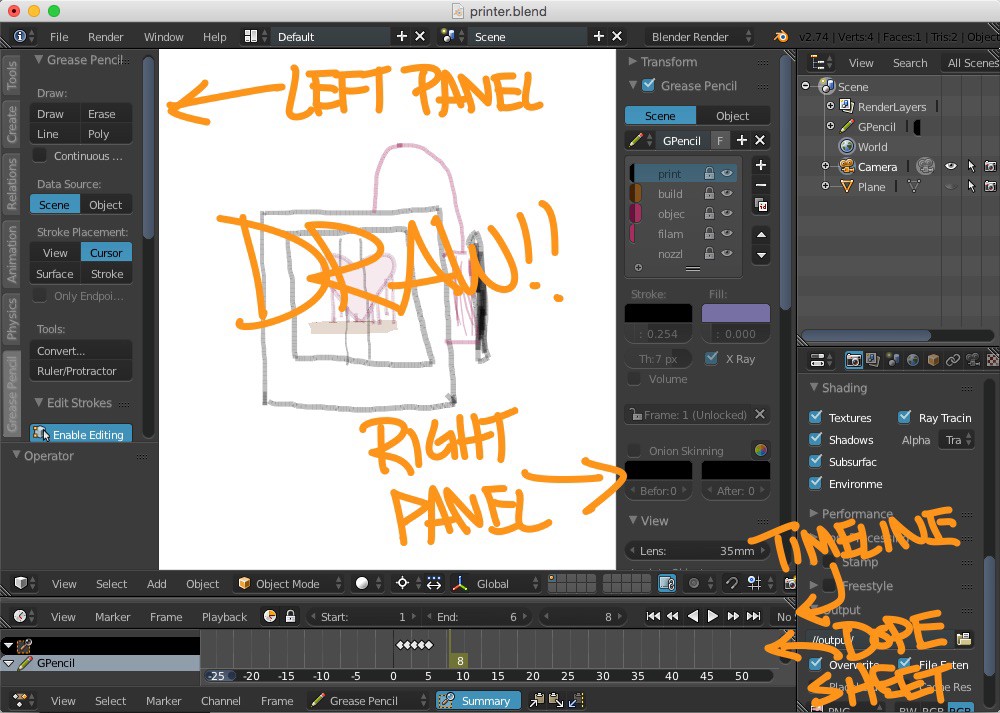
Before I start, I make sure to set up Blender for Grease Pencil Animation. You can download my “Starter Blend File.” A few things I did here:
- Set both panels to relevant Grease Pencil sections
- Include the Timeline (for play/stop) and Dope Sheet (keyframes).
- Set a white background, making it easy to embed on Medium and emails.
Step 1: Draw
There are five layers I used in my simple printer animation. The printer frame, the build plate, the printed object, the filament, and the nozzle.
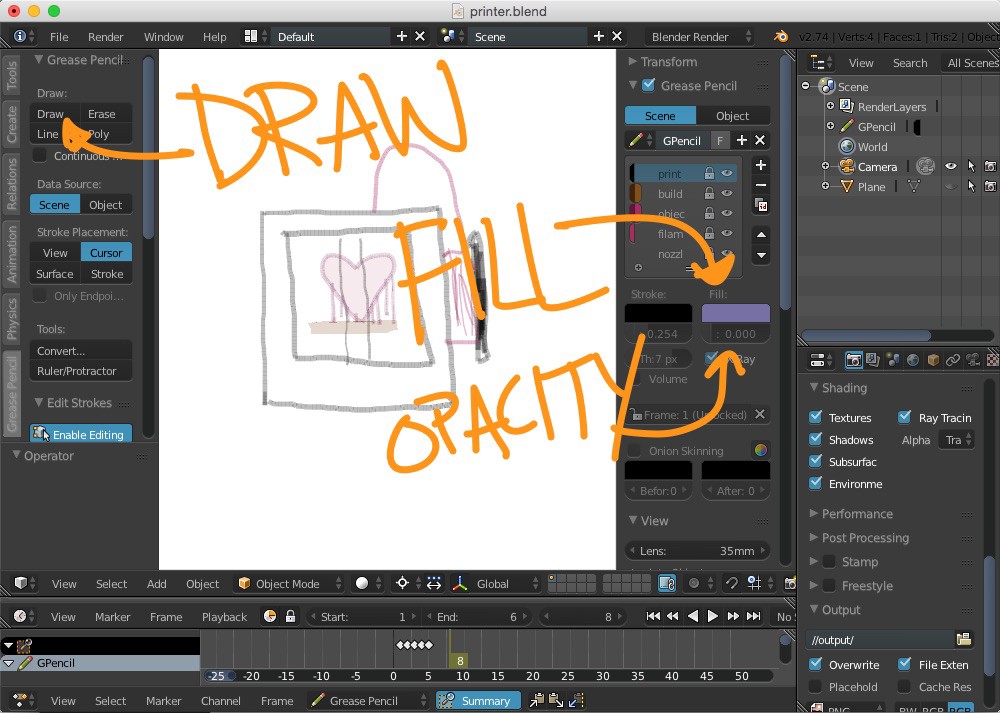
To draw hold down “D” on the keyboard and use your mouse or pen to draw. Alternatively, you can also go to the Grease Pencil tab and click “Draw.”
For the build platform and the heart object, I drew the outline and used the fill tool. To fill an outline with color, adjust the “Fill Opacity” value.
Step 2: Add more frames
The animation part works like a flipbook. You draw a frame in an animation, and then draw another frame.
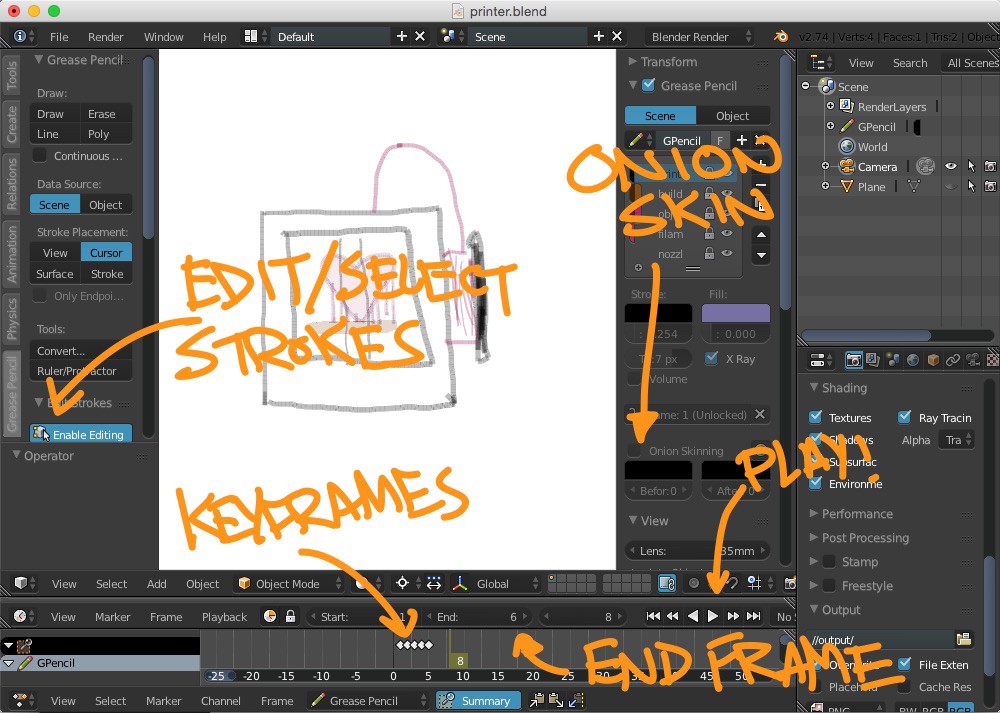
In my wee little 3D printer animation, there are only 6 keyframes. Right click or use your keyboard arrow keys to move from one frame to the next in the Dope Sheet (the area with the keyframe). Start drawing to automatically add a new keyframe.
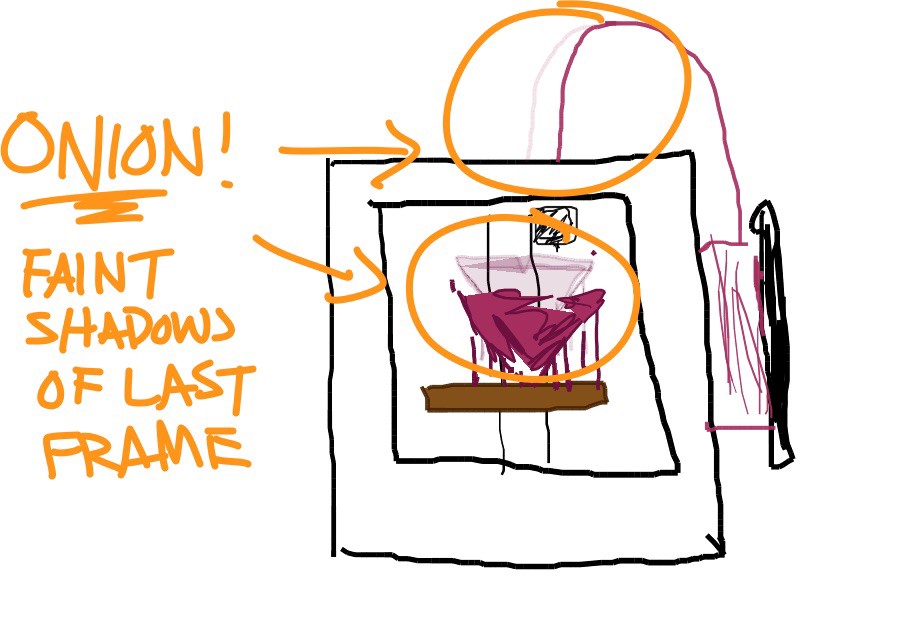
Now, when you start drawing on a new keyframe the old drawing disappears. However, you can turn on the “Onion” skin feature to see a faint shadow of the last keyframe.
For the build plate, I didn’t need to redraw it, just move it down. To do that, click “Enable Editing” in the left toolbar, then select all the points you want to move, and use key “G” to move the platform down.
Other useful object manipulation short keys are “S” for scale, and “R” for rotation. You can also bind a manipulation to an orientation. In the filament animation, I hit “SX” to squish it horizontally (S for scale, and X for x-axis).
You can scrub through the timeline using the arrow keys, or just hit “Play.”
Last, you’ll want to specify the end frame. To do this, just type in whatever frame number you want as the animation’s end frame. You can also start the animation at an arbitrary frame number too.
Step 3: Export to movie file or gif
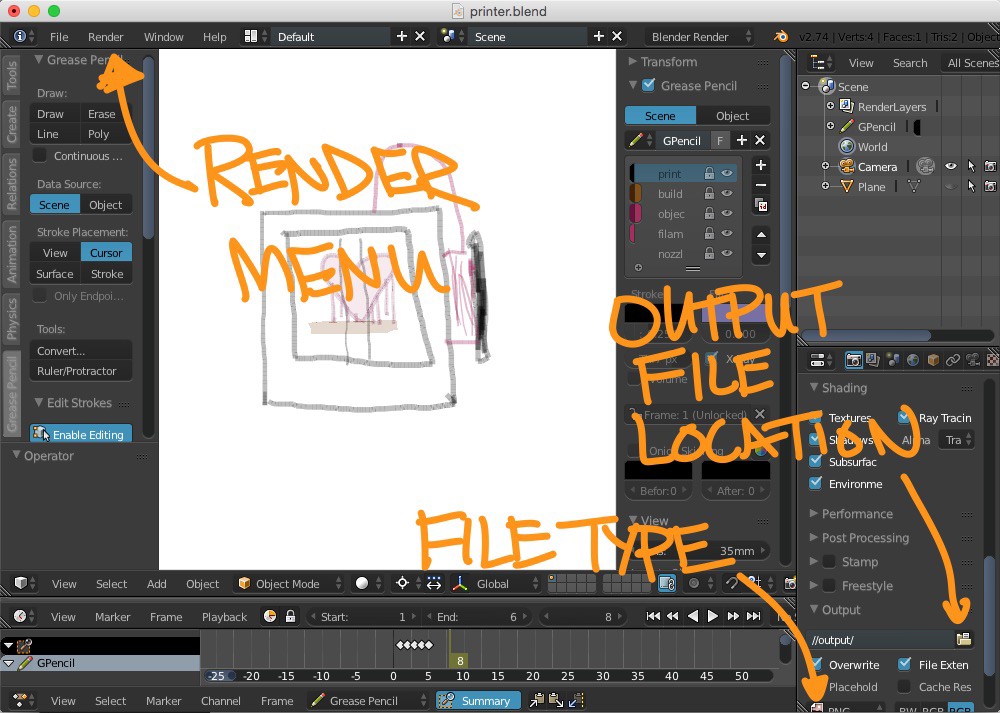
First, specify the File Location where you want to dump your files and file type. You’ll also need to specify a File Type. If you want to make animated gif, export to PNG or JPG. Blender will export each frame separately. You can use Photoshop or GIMP to compile these into an animated gif.
Second, frame your shot. You can hit Shift+B or Spacebar Search for “Zoom to Border” and draw the area to focus on. On my MacBook, I can use the two finger pinch to zoom in an out. I hold down the shift key and use two fingers to pan around. Then on the top menu, I select [Render > OpenGL Image] to get a sense of whether things are in frame or not.
Last, select [Render > Open GL Animation] to animate. And then…
P.S. Here’s the source file for the 3D Printer animation, using Blender 2.74.