Wifi Connected LED using Guide.js
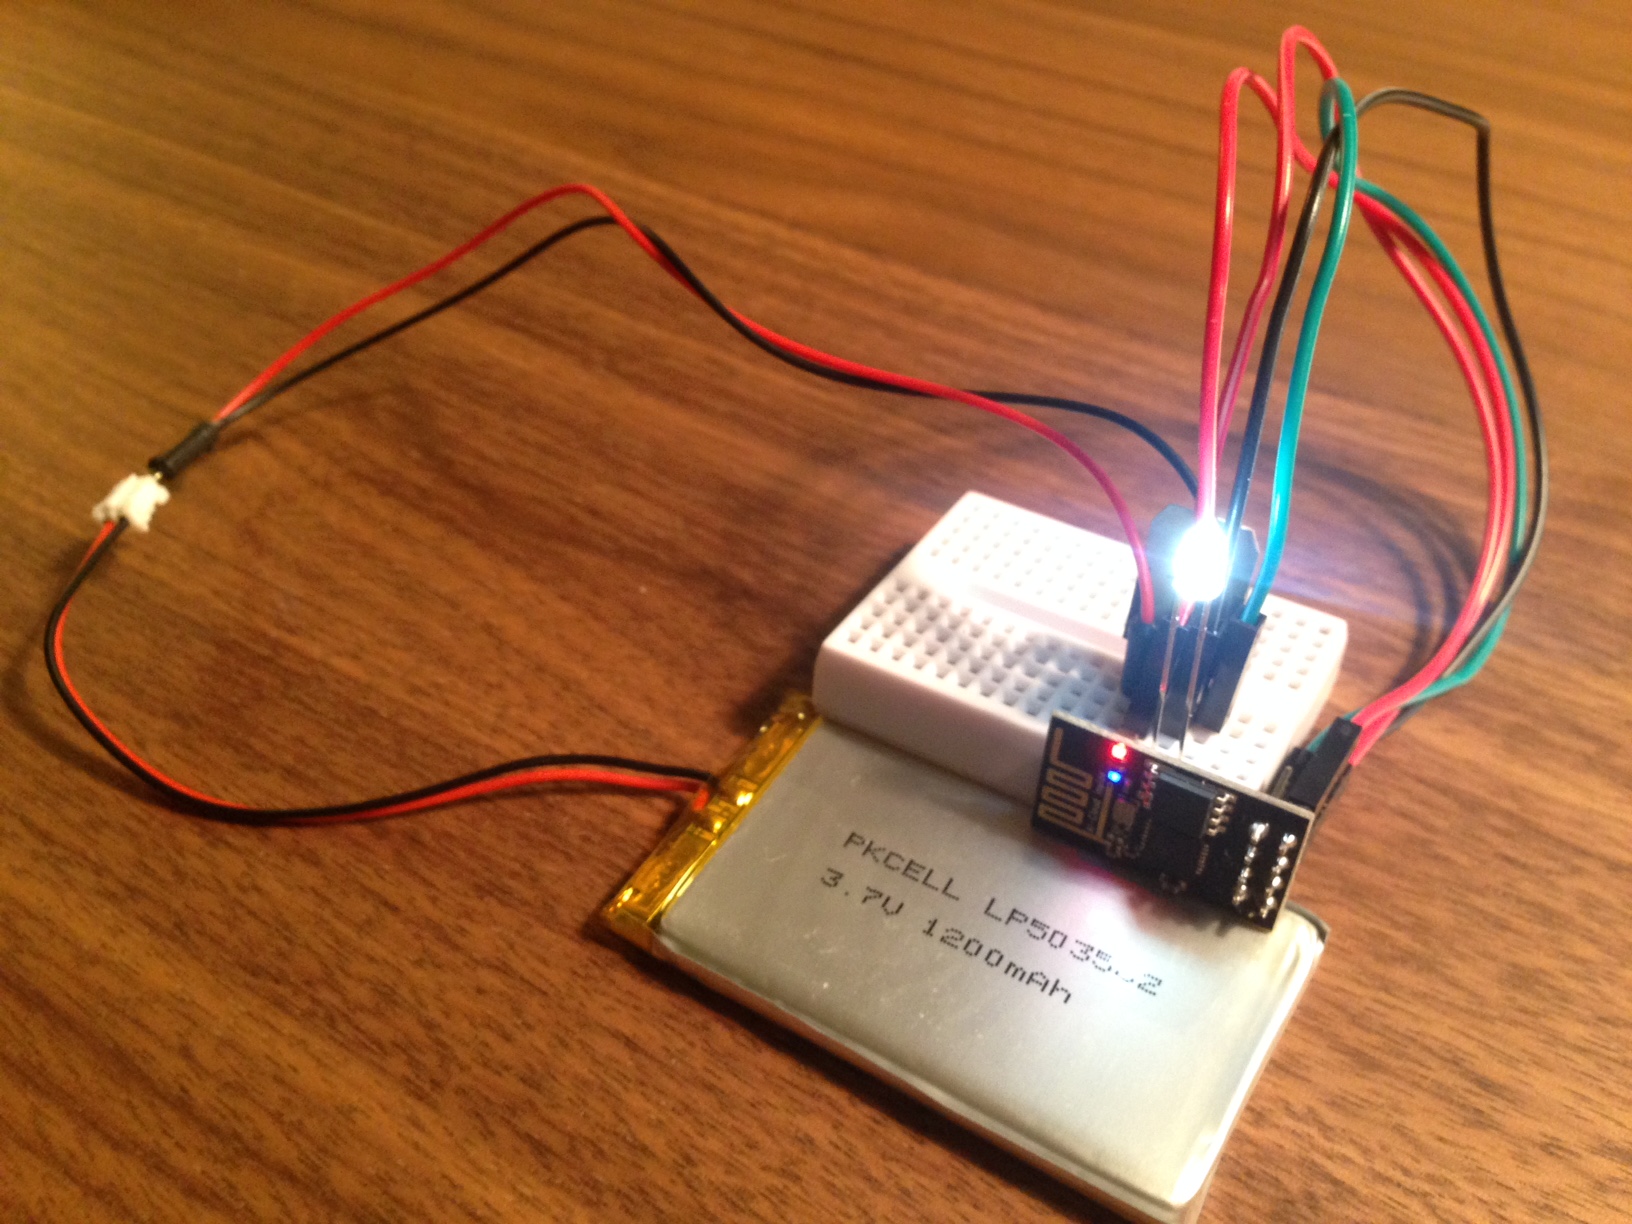
I wasn't kidding when I said I'd use Guide.js, my new framework for writing guides and tutorials. Here's a rewrite of my ESP8266 to LED tutorial. I think it's much neater than the previous version.
Ingredients
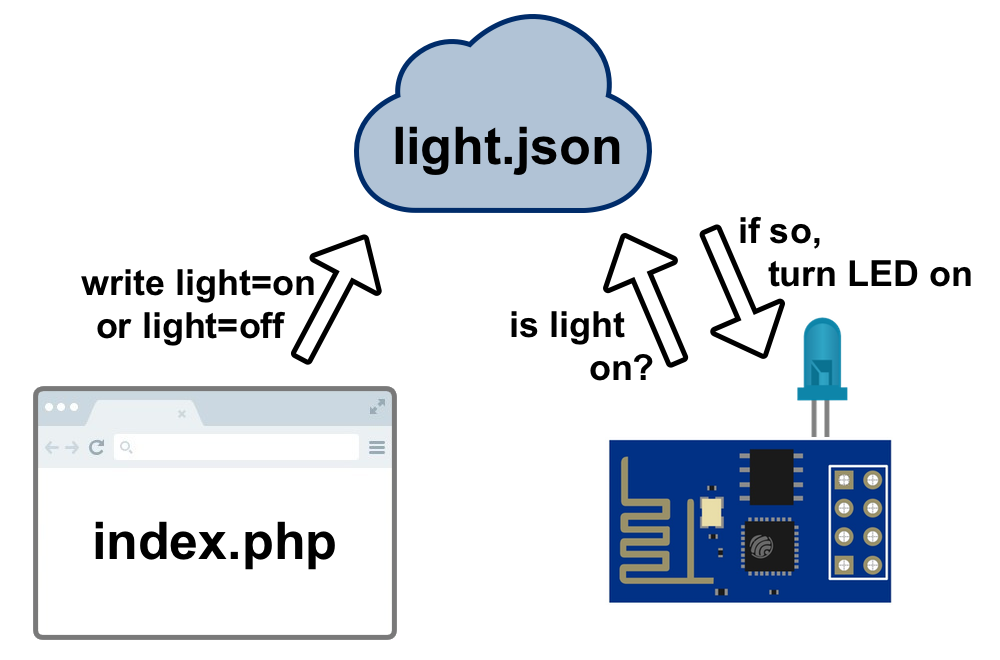
Workflow
- PHP page writes on/off instructions to JSON file based on user input
- ESP8266 pings light.json, reads instructions, and turns on/off led
```
$ sudo nano light.json
$ chmod 755 -R light.json
```
Step 1: Create JSON using Shell Scripts
- go to the directory of your PHP file
- create light.json
- assigns permission so index.php can write to it
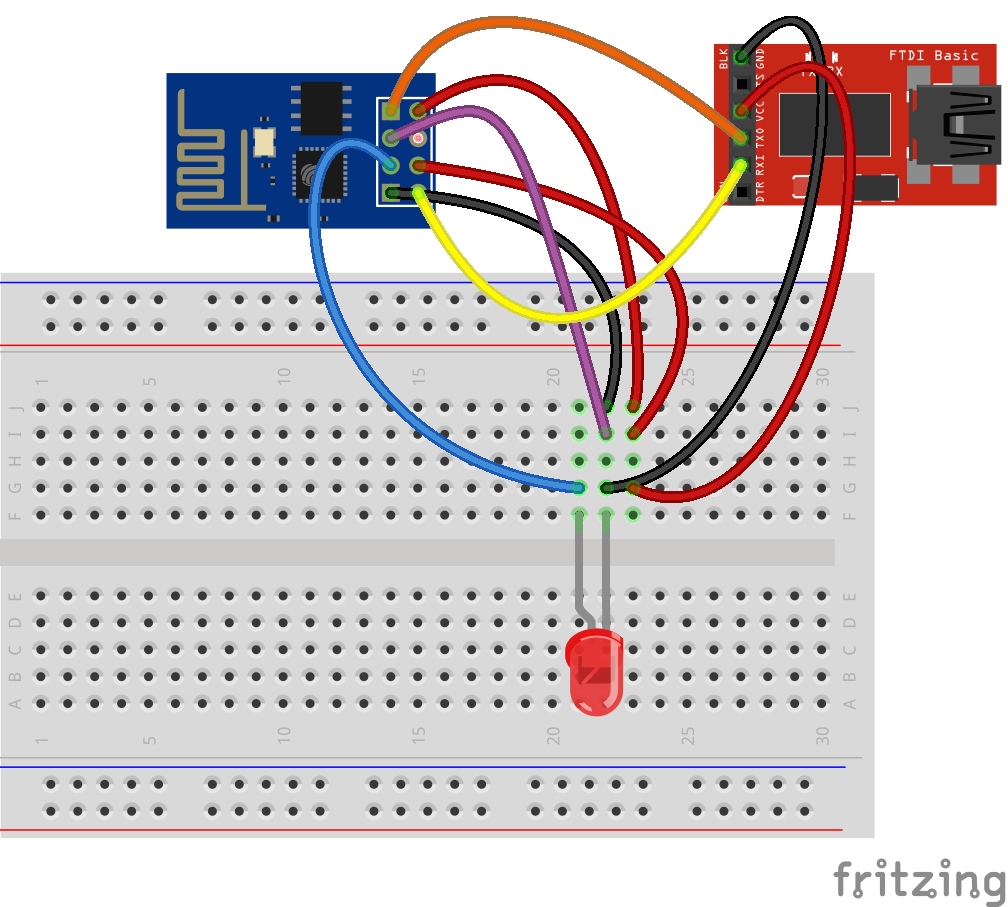
Step 3. Wire Things Up in Flash Mode
- ESP's VCC > VCC
- ESP's CH_PD > VCC
- ESP's GND > GND
- ESP's RX > FTDI's TX
- ESP's TX > FTDI's RX
- ESP's GPIO0 > GND
(indicate flash mode) - LED's GND > GND
- LED's PWR > ESP's GPIO2
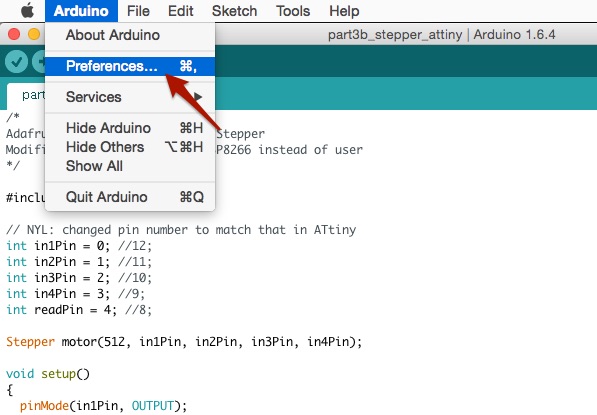
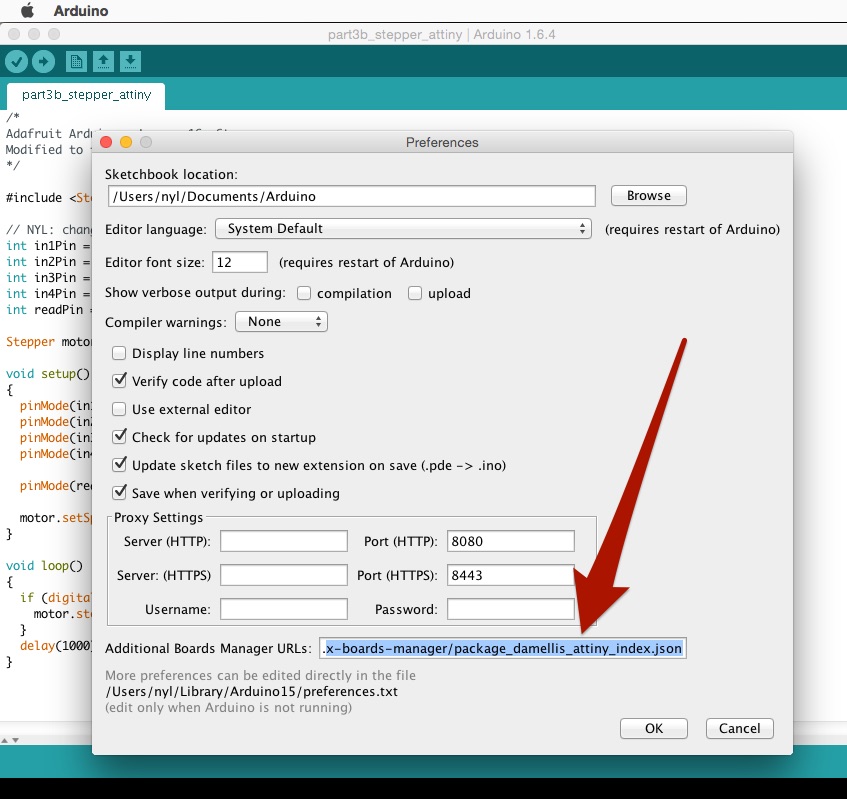
<img src="http://blog.nyl.io/content/images/2015/08/arduino_esp_setup.jpg" data-caption="Install ESP: Set Options for ESP8266" />
Step 4. Install ESP in the Arduino IDE
Install ESP8266 Board
- Go to preferences
- Copy this link's url into "Additional Board Manager URLs" box
- Click OK
- Board: Generic ESP8266
- CPU Frequency: 80 MHz
- Flash size: 4M
- Upload speed: 115200
- Port: my USB port (this shows up once you plugged everything in)
- Programmer: AVRISP mkll
#include <ESP8266WiFi.h>
#include <ArduinoJson.h>

const char* ssid     = "";
const char* password = "";

const char* host     = ""; // Your domain
String path          = "/path/to/light.json";
const int pin        = 2;

void setup() {
  pinMode(pin, OUTPUT);
  pinMode(pin, HIGH);
  Serial.begin(115200);

  delay(10);
  Serial.print("Connecting to ");
  Serial.println(ssid);

  WiFi.begin(ssid, password);
  int wifi_ctr = 0;
  while (WiFi.status() != WL_CONNECTED) {
    delay(500);
    Serial.print(".");
  }

  Serial.println("WiFi connected");
  Serial.println("IP address: " + WiFi.localIP());
}

void loop() {
  Serial.print("connecting to ");
  Serial.println(host);
  WiFiClient client;
  const int httpPort = 80;
  if (!client.connect(host, httpPort)) {
    Serial.println("connection failed");
    return;
  }

  client.print(String("GET ") + path + " HTTP/1.1\r\n" +
               "Host: " + host + "\r\n" +
               "Connection: keep-alive\r\n\r\n");

  delay(500); // wait for server to respond

  // read response
  String section="header";
  while(client.available()){
    String line = client.readStringUntil('\r');
    // Serial.print(line);
    // we’ll parse the HTML body here
    if (section=="header") { // headers..
      Serial.print(".");
      if (line=="\n") { // skips the empty space at the beginning
        section="json";
      }
    }
    else if (section=="json") {  // print the good stuff
      section="ignore";
      String result = line.substring(1);

      // Parse JSON
      int size = result.length() + 1;
      char json[size];
      result.toCharArray(json, size);
      StaticJsonBuffer<200> jsonBuffer;
      JsonObject& json_parsed = jsonBuffer.parseObject(json);
      if (!json_parsed.success())
      {
        Serial.println("parseObject() failed");
        return;
      }

      // Make the decision to turn off or on the LED
      if (strcmp(json_parsed["light"], "on") == 0) {
        digitalWrite(pin, HIGH);
        Serial.println("LED ON");
      }
      else {
        digitalWrite(pin, LOW);
        Serial.println("led off");
      }
    }
  }
  Serial.print("closing connection. ");
}
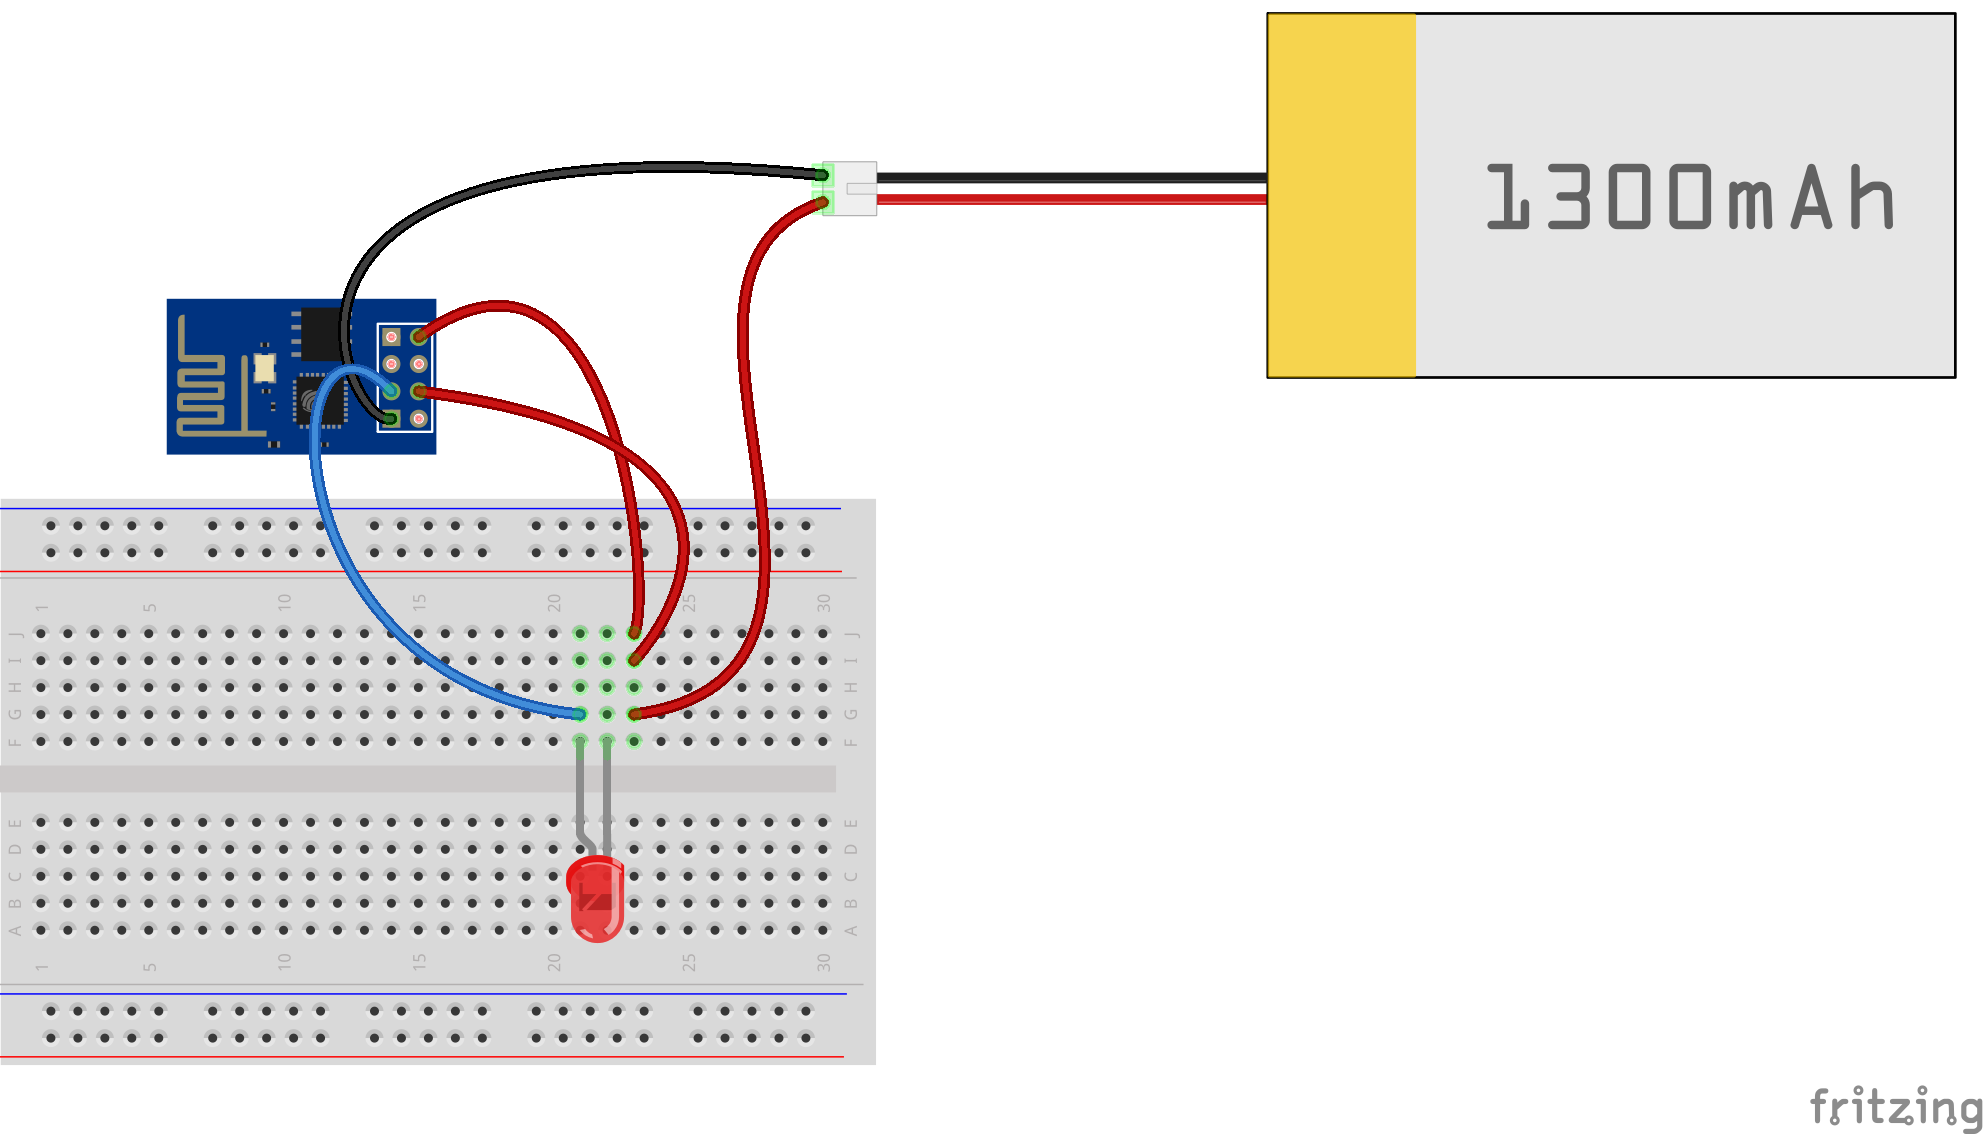
Step 6. Wire Things Up in Run Mode
- ESP's VCC > VCC
- ESP's CH_PD > VCC
- ESP's GND > GND
- LED's GND > GND
- LED's PWR > ESP's GPIO2
Next Steps
There you have it! Not bad. I like it much better than the old, unorganized version. A few things I'd like to add:
- Table of Contents and the ability to link to various sections
- A way to parse this using Markdown, HTML is just... sigh...
- A way to have a carousel of images combined with code, iframes, and other custom elements
- Wrap all the guide-step classes in a guide class, then add things for displaying intro descriptions, ingredients lists, TOC, etc.
Ok. Now go make stuff.